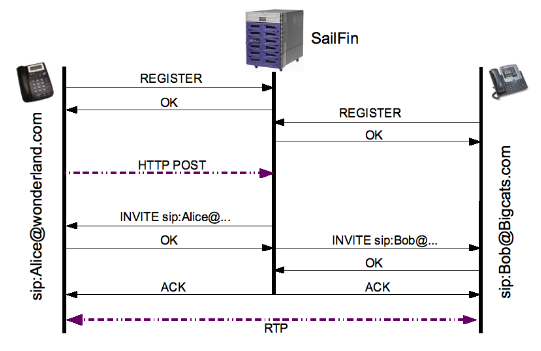
Sip Servlet Click-to-Dial exampleThis is an example of a click-to-dial application using Sip Servlets. Two users register softphones, and may call each other by clicking on a web site. The example code is available for download here. About the exampleThis simple example shows how SIP Servlets can be used along with HTTP servlets to place calls from a web page. This example consists of the following steps:
Here are the SIP messages that are exchanged in this process:
To handle these messages, we use two SIP Servlets and one HTTP Servlet. An overview of these servlets is given below. Registrar SIP ServletThe first servlet is a SIP Servlet that handles softphone registration. When Alice or Bob launches their softphone, it registers the softphone address with a SIP proxy. We will record the softphone contact information using Java Persistence API. It will be used later to call Alice or Bob. Below is pseudocode for clicktodial.sip.RegistrarServlet. The full code can be found in the download bundle. /** A SIP Servlet to handle SIP REGISTER requests. */
public class RegistrarServlet extends SipServlet {
// inject the SipFactory
@Resource(mappedName="sip/ClickToDial")
private SipFactory sf;
/** Handle a SIP Register request. */
protected void doRegister(SipServletRequest req)
throws ServletException, IOException
{
int response;
// Figure out the name the user is registering with. This is the
// user portion of the SIP URI, e.g. "Bob" in "sip:Bob@x.y.z:port"
String username = ...
// get the Person object from the database
Person p = mf.getPerson(username);
if (p == null) {
// no person found in the database
response = SipServletResponse.SC_NOT_FOUND;
} else {
// the Expires header tells us if this is a registration or
// unregistration attempt.
int expires = Integer.parseInt(req.getHeader("Expires"));
if (expires == 0) {
// unregister
response = handleUnregister(req, p);
} else {
// register
response = handleRegister(req, p);
}
}
// send the response
SipServletResponse resp = req.createResponse(response);
resp.send();
}
/** Handle a registration request */
private int handleRegister(SipServletRequest req, Person p)
throws ServletException
{
// Get the contact address from the request. Prefer the
// "Contact" address if given, otherwise use the "To" address
Address addr = sf.createAddress(req.getHeader("Contact"));
// store the contact address in the database
p.setTelephone(addr.getURI().toString());
ModelFacade mf = (ModelFacade) getServletContext().getAttribute("Model");
mf.updatePerson(p);
return SipServletResponse.SC_OK;
}
}
PlaceCall HTTP ServletThe PlaceCall HTTP Servlet receives an HTTP post when Alice clicks on the "Call" link in her browser. It sends the initial SIP INVITE request to Alice and stores Bob's address in the SipSession. Below is pseudocode for clicktodial.web.PlaceCallServlet. /** Place a phone call when a user clicks */
public class PlaceCallServlet extends HttpServlet {
// inject the SipFactory
@Resource(mappedName="sip/ClickToDial")
private SipFactory sf;
/** Processes requests for HTTP POST method. */
protected void processRequest(HttpServletRequest request,
HttpServletResponse response)
throws ServletException, IOException
{
// get the source and target from the request
String sourceUserName = request.getParameter("source");
String targetUserName = request.getParameter("target");
// look up the relevant Person objects in the database
ModelFacade mf = (ModelFacade) getServletContext().getAttribute("Model");
Person source = mf.getPerson(sourceUserName);
Person target = mf.getPerson(targetUserName);
// get the phone numbers as SIP Addresses
SipApplicationSession appSession = sf.createApplicationSession();
Address to = sf.createAddress(source.getTelephone());
Address from = sf.createAddress(target.getTelephone());
// create an INVITE request to the first party from the second
SipServletRequest req = sf.createRequest(appSession, "INVITE", from, to);
// store the second party's address in the sip session
req.getSession().setAttribute("SecondPartyAddress", from);
// send the INVITE request
req.send();
}
}
Call SIP ServletThe Call SIP servlet handles the OK response to the INVITE sent by the PlaceCall servlet above. Once an OK is received from Alice, this servlet sends an INVITE to Bob, specifying Alice's media preferences. When an OK is received from Bob, it sends an ACK to both parties. It also handle the BYE and call tear down. Pseudocode for clicktodial.sip.CallSipServlet is below. /** A SIP Serlvet that handles responses to click-to-dial invites
*/
public class CallSipServlet extends SipServlet implements SipSessionListener {
// inject the SipFactory
@Resource(mappedName="sip/ClickToDial")
private SipFactory sf;
/** Handle an OK response. */
protected void doSuccessResponse(SipServletResponse resp)
throws ServletException, IOException
{
SipSession session = resp.getSession();
// if the response was OK, invite the other party
if (resp.getStatus() == SipServletResponse.SC_OK) {
// we are in one of two states here. Either this OK is from
// the original invitee, meaning they answered and it is time
// to ring the second pa
2000
rty, or the OK is from the second
// party, and we should acknowlege the call with both sides
// check for the first case, where this OK is from the original
// invitee
Address secondPartyAddress =
(Address) resp.getSession().getAttribute("SecondPartyAddress");
if (secondPartyAddress != null) {
// invite the second party
SipServletRequest invite = sf.createRequest(resp.getApplicationSession(),
"INVITE", session.getRemoteParty(), secondPartyAddress);
// get the SDP from the OK message
if (resp.getContentType().equals("application/sdp")) {
invite.setContent(resp.getContent(), "application/sdp");
}
// send the invite
invite.send();
} else {
// send acks
SipServletRequest secondPartyAck = resp.createAck();
SipServletRequest firstPartyAck =
(SipServletRequest) resp.getSession().getAttribute("FirstPartyAck");
// get the SDP from the second party's OK message
if (resp.getContentType().equals("application/sdp")) {
firstPartyAck.setContent(resp.getContent(), "application/sdp");
}
firstPartyAck.send();
secondPartyAck.send();
}
}
}
}
Installing the examplePlease follow the following steps to install and start the server
Follow the steps below to the application
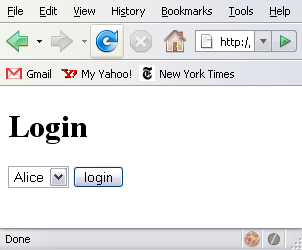
Alternatively, you can skip NetBeans and use the <b>ant</b> scripts. There is a <b>build.xml</b> in the top level directory that will automatically build it and generate a deployable archive in <b>dist/ClickToDial.war</b>. You can deploy using <b>asadmin deploy dist/ClickToDIal.war</b>. Before you deploy, create a JDBC resource called jdbc/sample. You can do that by logging into the Admin console (http://localhost:4848) and clicking on the little triangle to expand <b>Resources</b>. Click on <b>JDBC</b>. Click on <JDBC Resources</b>. You will see a list of already existing JDBC resources. If you do not see <b>jdbc/sample</b>,you can create it by clicking on <b>New</b> button. Use <b>jdbc/sample</b> for name and choose the pre-defined <b>DerbyPool</b> for the database connection pool. Click <b>OK</b>. Running the exampleYou can test this example using any SIP-based software phone. Instructions are provided for freely available X-Lite softphones: x-lite 1. Browse to the login screenIn your web browser, open http://hostname:8080/ClickToDial, where hostname is the name of the host where SailFin is running.
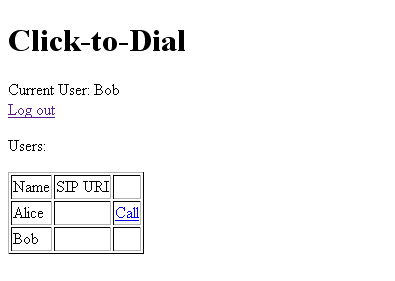
2. Log in as BobStart off by logging in as Bob. Select 'Bob' in the drop-down menu and click Login. This should bring up Bob's home page, with no softphone registered:
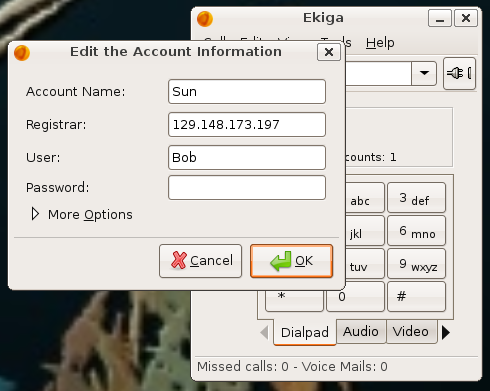
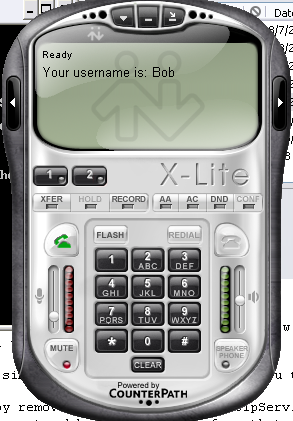
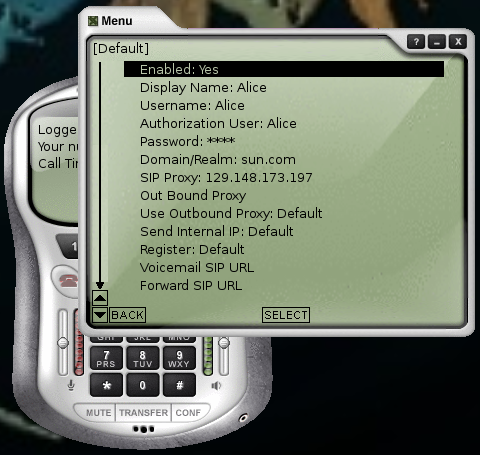
3. Setup Bob's SoftphoneX-Lite is a freely available softphone for many platforms. To set up Bob's softphone, I used the settings below, where 129.148.173.187 is the IP address of my SailFin server. It is running on port 5060.
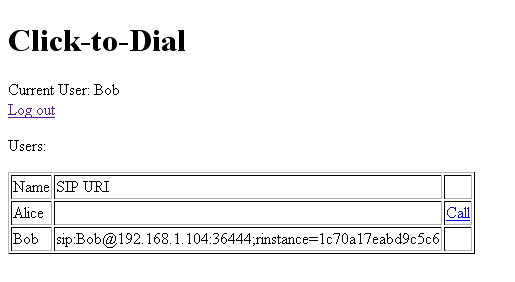
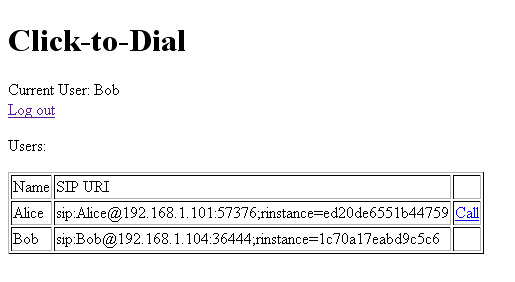
With X-Lite setup, enable the account to perform the registration to SailFin server which is acting as a registrar. You should see a message like the following in the SailFin log: Received register request: "Bob"<sip:Bob@192.168.2.103> Register address: "Bob"<sip:Bob@192.168.2.103:9990;transport=udp>;expires=3600 X-Lite also will show a message: <b>You are logged in as Bob</b>. Once X-Lite successfully registers, you can reload Bob's Login web page to get more information about his registration:
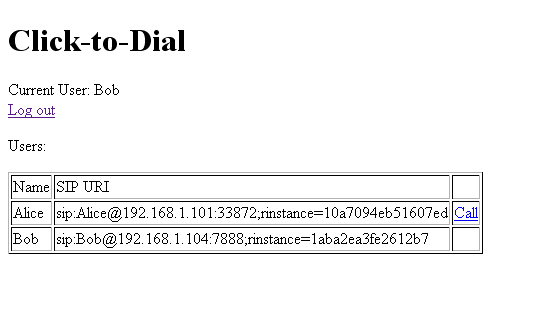
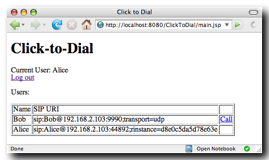
4. Log in as AliceOn another computer, navigate to the login page and login as Alice. 5. Setup the x-lite Softphone. Same as above, but configured for Alice.After Alice's phone registers, you should be able to reload the page and see both softphone registered and ready:
6. Place a CallNow we are all set up to have Alice place a call to Bob (or Bob to Alice). When Alice clicks on the "Call" link next to Bob's name, her softphone should ring. When she picks up, Bob's sofphone should ring. When he answers, the call is connected. Either can disconnect first and the other is automatically disconnected by CallServlet. Make sure, you do the web login first. If the SIP Soft Phone connects to SailFin before the web login, Registration will fail. The sample can be modified to remove this limitation, if you wish. For More InformationSee the SailFin site as well as the Sip wiki page. |

