GlassFish v3 Prelude Building instructions Back to AdminConsole V3 Last updated on 8/28/208
This document includes information on
- Where to get required software
- How to checkout and build GlassFish v3 Prelude
- How to start up the server and access the Admin Console
- How to debug the console in NetBeans
Required Software Download and intall JDK 5.0 Latest version Although GlassFish v3 Prelude runs on Java SE 6, you should build it using JDK 5.0. You can download it from http://java.sun.com/javase/downloads/index_jdk5.jsp
- JAVA_HOME to your installed location
- Add JAVA_HOME/bin to your path.
Download and install SVN http://downloads.open.collab.net/collabnet-subversion.html Download and install Maven2 version 2.0.7 http://maven.apache.org/download.html
After installation, verify it
Checkout and Build After installing the above required software, you can checkout and build by:
svn checkout https://svn.java.net/svn/glassfish-svn/trunk/v3
cd v3
mvn install
Note: if you get a java OutOfMemory Error while running the mvn install, you want to set this environment
export MAVEN_OPTS=-Xmx512m
Setup for accessing Admin Console After the above steps you have created v3/distributions/web/target/web.zip . This zip file is the web distribution, includes all the plugin modules for Admin Console except admingui.war itself. Here is the steps to setup your environment. There are many ways to start the server, you can refer to http://wiki.glassfish.java.net/Wiki.jsp?page=V3FullBuildInstructions for more information.
cd v3
unzip distributions/web/target/web.zip
cp admingui/war/target/admingui.war glassfish/lib/install/applications/admingui.war
cd glassfish/bin
asadmin start-domain
Now, you can access the admin console by http:localhost.4848- Debugging the Admin Console in NetBeans You need to start the server in debug mode.
cd v3
java -Xdebug -Xrunjdwp:transport=dt_socket,server=y,suspend=n,address=9009 -jar glassfish/modules/glassfish-10.0-SNAPSHOT.jar
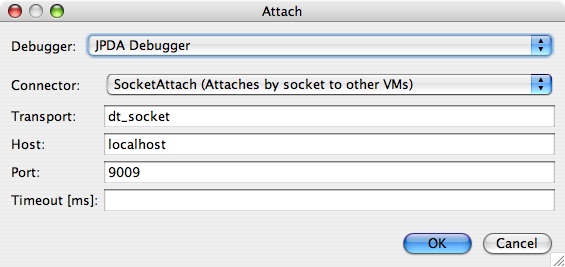
Once the server is running, in NetBeans, attach the server by doing Run -> Attach Debugger ....
Fill in the popup box,
If you have the projects opened, you can set break point and NetBeans will stop at the breakpoints.
|
