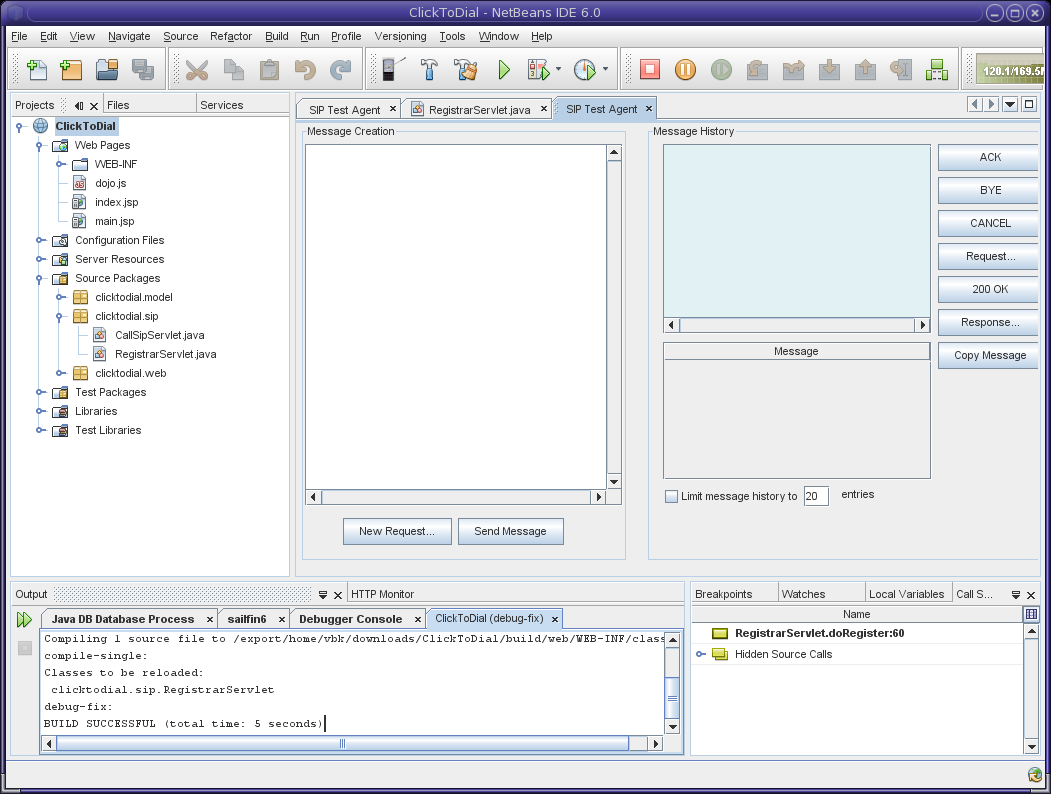
{ALLOW comment All }
{ALLOW rename Authenticated }

Deploying and Debugging the ClickToDial sample from NetBeans 6.0 with the SIP Test Agent

This is an example of using the SIP test agent modules that are being developed for NetBeans to deploy and debug the ClickToDial sample. You can read through a description of the ClickToDial sample to get more information about the sample application.

The code for ClickToDial is available for download here.

The Environment

I am using Sailfin build 14, NetBeans 6.0 (the Web and Java EE bundle) and release 0.1 of the Test Agent.

This tutorial assumes that you have successfully:

  1. Installed Sailfin
  2. Installed NB 6.0
  3. Downloaded the ClickToDial sample

The steps

  1. Install the Test Agent
    1. Download the modules that implement the test agent
    2. Install these modules into NetBeans 6.0\\!installAgent1.png!
      !installAgent2.png!
  2. Prepare the server
    1. Register the Sailfin domain in the IDE
    2. Start the domain in "Debug mode"
    3. Verify that there is a JDBC Resource named jdbc/sample registered with the server
    4. Open the ClickToDial project in the IDE
    5. Use the "Undeploy and Deploy" item from The ClickToDial project's right click menu to deploy the code to the domain.
    6. Open your browser and access http;//localhost:8080/ClickToDial
    7. Press the login button
  3. Register Alice
    1. Click the Test Agent tool in the Build bar
      This Test Agent will be Alice's "phone".
    2. Press the New Request button in the Test Agent window
    3. Press the Send button
    4. Reload the page in the browser
      Alice still doesn't have a SIP URI!
    5. Open the source to clicktodial.sip.RegistrarServlet in the IDE and set a breakpoint in the doRegister method
    6. Attach to the server
    7. Switch back to the Test Agent tab and press the 'Send Message' button
    8. Step through the doRegister method and discover that the REGISTER method needs to have an Expires header
    9. Switch back to the Test Agent tab and presse the New Request button. Add an Expires header to the message and press Send.
    10. Step through the doRegister method again and see that expire has a value > 0!
    11. Switch back to the browser and reload the page.
      Now Alice's "phone" (the test agent) is registered.
  4. Register Bob
    1. Log out as Alice and login as Bob.
    2. Switch back to the IDE and press the Test Agent tool, to open a second test agent tab.
    3. Double click on the new tab to make the window "full screen".
    4. Change the Listening Port to 6061 and press the Apply button.
    5. Double click the tab again to reduce the back to its original size.
    6. Press the New request button and change all reference to Alice to Bob.
      Add an Expires header to this message and Send it.
      !bobRegistrationReady.png!
    7. Reload the page in the browser.
      Bob's "phone" is registered, and he can click the Call link.

      http://c12.statcounter.com/counter.php?sc_project=1230527&java=0&security=cfcfc796&invisible=0

doRegisterBP.png (image/png)
readyToCallAlice.png (image/png)
psych.png (image/png)
startToRegisterBob.png (image/png)
postLoginAlice.png (image/png)
addExpiresHeader.png (image/png)
expireHeaderMissing.png (image/png)
agentInstalled.png (image/png)
deployedAndOpen.png (image/png)
installAgent1.png (image/png)
fullSizeWindow.png (image/png)
prepRegisterAliceRequest.png (image/png)
aliceRegistered.png (image/png)
attachToServer.png (image/png)
installAgent2.png (image/png)
bobRegistered.png (image/png)
bobRegistrationReady.png (image/png)
IndexJsp.png (image/png)